

Amazon S3, which stands for “Simple Storage Service” The core functionality of S3 focuses on general object storage in the cloud, taking full advantage of AWS’s cloud infrastructure. Amazon S3 supports a wide variety of file types. You can store large files up to five terabytes in size, small files, media content, source code, spreadsheets, emails—whatever you need. It’s also highly available, as AWS replicates your data across multiple data centers within the region you’ve chosen. So, even if one data center goes down, your data remains accessible from another.S3 also offers high durability, so data loss is not a concern.
You can create highly sophisticated application architectures by leveraging S3 in combination with other AWS services. I’ll give you specific examples later, but here are a few broad use cases:
Website Hosting: S3 can store static content like HTML, CSS, JavaScript, image files, and more for your website.
Database Backups: Many organizations periodically back up their databases, storing snapshots in S3 for long-term retention.
Data Processing Pipelines: You can build a pipeline to ingest large volumes of data into S3 and even transform the data upon arrival by hooking into specific events emitted by S3.
Table of Contents
Navigate to S3
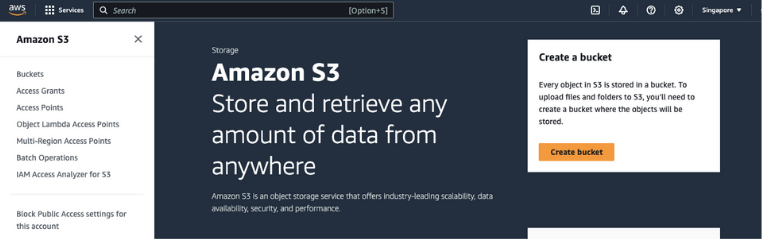
- how to create an AWS S3 bucket and how to upload files and folders to the S3 bucket. connect to your AWS console, then click on Services. If you are unable to find S3, click on Services, then search for S3. Click on Amazon S3, then click on Create Bucket, or go to Buckets and click on Create Bucket. Both options are the same.
Create a New Bucket and Region
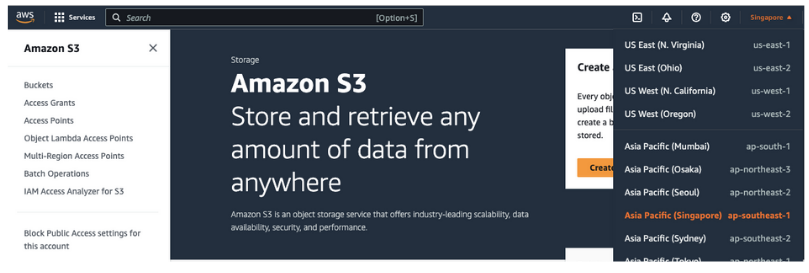
- Click on Create Bucket, then select a region. These are the regions available for me. Okay, so from this list, you have to select the region. I’m going with the Asia Pacific (Singapore) ap-southeast-1. Then provide the bucket name.
Amazon s3 Set Bucket Name

- The bucket name must be unique within the global namespace, which means this bucket name is global to the AWS cloud provider and not just for this specific account. Click on the Bucket Naming Rules in a new tab. These are the rules you can go through to give valid names for the bucket. I’m naming it techlinuxbucket or simply techlinux-S3-storage-1.
Configure Bucket Settings
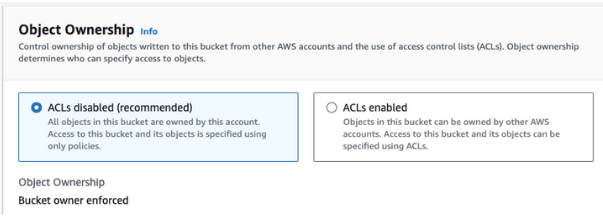
- Next, under Object Ownership, select ACLs Disabled. Access Control Disabled is recommended based on your requirements.
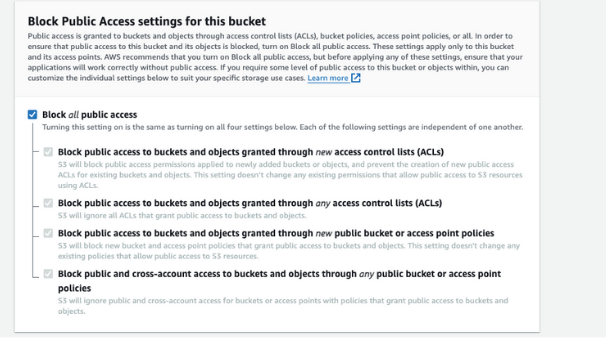
- If you want to block all public access, check this option. If you don’t want it, uncheck it.
Set Additional Options (Optional) Based on your requirements
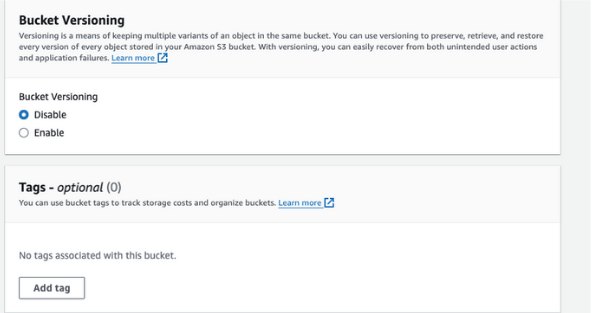
- If you enable versioning, after every modification or file upload, a new version will be created. At present, I’m going to disable it, but you can enable it later. For Bucket Key, enable it by clicking on it.

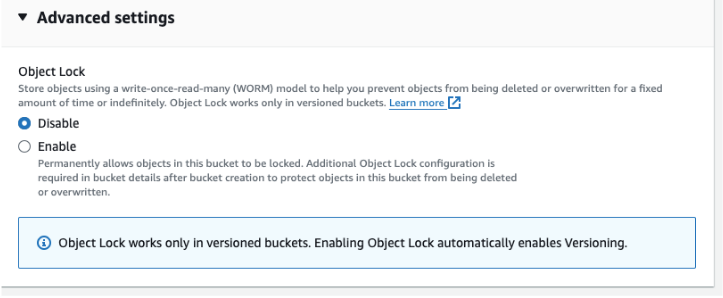
- Then, under Additional Settings, Object Lock can be enabled or disabled as needed.
Upload Files to the Bucket

- Click on Create Bucket. The bucket is successfully created. Suppose you try to create a bucket with the same name; it will throw an error. See here, it says a bucket with the same name already exists, so we cannot create another one with the same name.
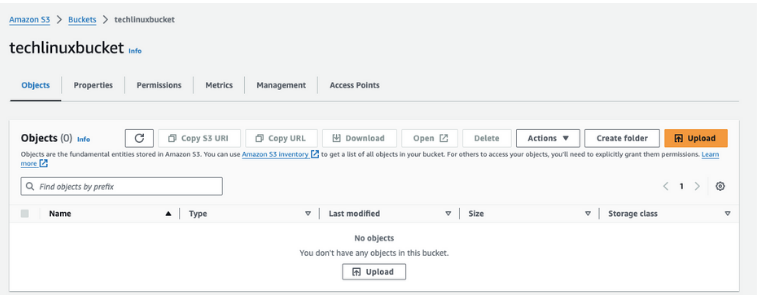
- Now, we have created the S3 bucket. Click on it to upload files. Click on Upload, then Add Files, and select the files you want to add. If you want to add an entire directory, select it and click on Upload.
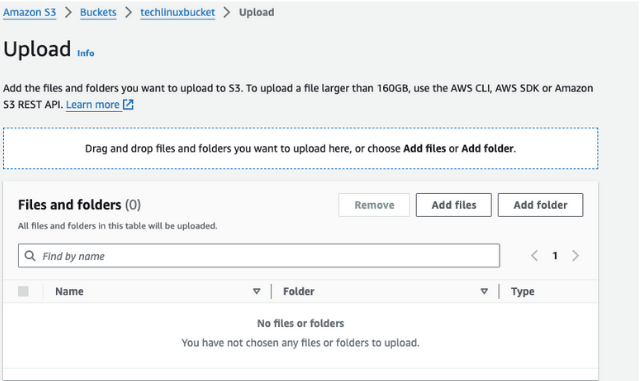
- This is one way—the graphical way. Alternatively, you can drag and drop files directly into the S3 bucket. Click on the bucket, select the files you want to upload, and drag them into the bucket.
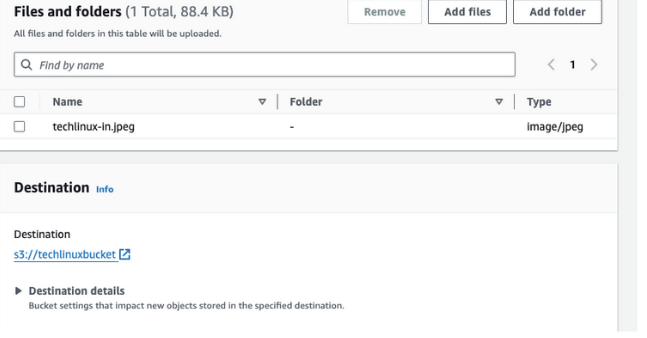
- Once uploaded, you can see the files and their sizes. To add metadata, click on Add Metadata and then Upload both files.
- To create a folder, click on Create Folder, name it (e.g., store-o-to-schools_CSV-storage), and click on Create Folder. To upload files into this folder, click on the folder, then drag and drop the same files here. Select the files, choose the storage class if you want to provide properties, and click on Upload.
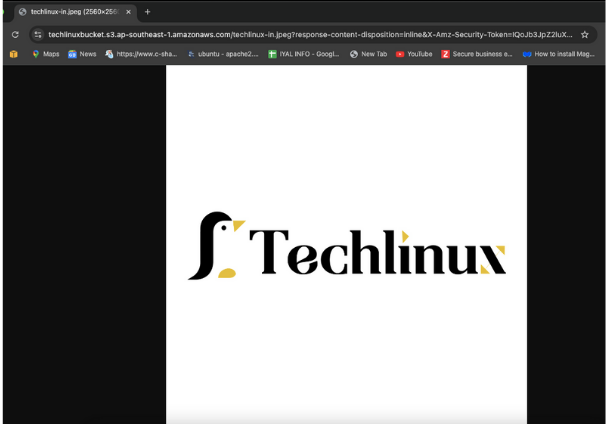
- You have successfully uploaded the files to the S3 bucket. To get the URI or URL for this bucket, copy the path and paste it as needed. This is the root path, but you can modify it by removing directories and adjusting the path as required. You can also go to Properties to edit them.
Delete Files from an Amazon S3 Bucket
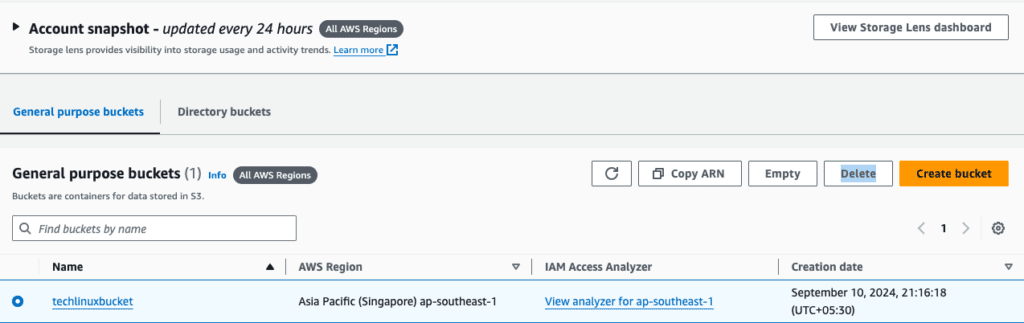
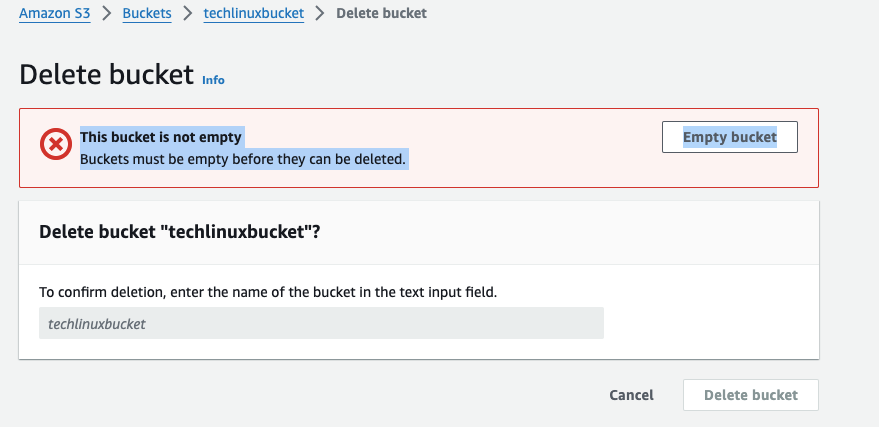
- If you want to delete the bucket, click on Delete. However, it won’t be deleted if the bucket is not empty. Click on Delete, and it will say the bucket is not empty.


- First, you have to empty the bucket by clicking on Empty Bucket, then provide the permanent delete confirmation by typing the bucket name. This will delete all the files and folders in the S3 bucket but not the actual bucket itself. Click on Empty to successfully delete the objects.

- Refresh, and now you can delete the bucket by clicking on Delete, providing the bucket name, and confirming the deletion. You will see that the bucket has been successfully deleted.


